Sunday, July 22, 2012

folded keychain bottle opener: packaging


Ready to be mailed.

I sold my first folded keychain bottle opener (aka business card bottle opener)! But I ran into the problem of shipping. My original plan was to put it in a regular envelope. But I felt that without some support, the opener might tear the envelope and get lost in the mail. So I devised a simple package from a piece of cardboard.

Easy to remove.
To insert or remove the bottle opener, you simply bend the cardboard on the line and slide the opener in or out. The cardboard is slightly thicker than the opener so it is pressed down where the opener slides in. This also allows the opener to sit flush with the rest of the cardboard. When the opener is in the envelope, it stays flat and locked in the center.

The first piece I sent out was cut with a razor, but future ones will use a laser-cut piece. Ideally, the packaging could also be the mailer, but this worked and was very inexpensive to ship.

Thursday, July 19, 2012

home still: condenser

I finally completed the condenser portion of the still. From the last update I brazed the coil into the main tube and added the collection portion of the condenser.

Collector before brazing.

This update took a little while because I was contemplating my approach for the collection portion. I eventually decided to approach it as simply as possible with a flat plate and a short tube up the center. These pieces were brazed to the stainless sanitary fitting and the fitting was then brazed to the outer tube. The center tube could be extended in the future by slipping another tube over. I will experiment with this to see which works better.

The condenser works by having the vapor come up the center through the small tube and condensing onto the cooling coil. It then drips downward and into the collection area formed by the plate and the two tubes. The liquid drains out through a tube on the bottom of the collector.

Completed condenser.

All the copper tube sections are completed. The next things to work on before testing the parts are the heating controls for the pot, and cooling system for the condenser and dephlegmator.

Friday, June 15, 2012

home still: column, dephlegmator

Completed dephlegmator and column.

Today I completed the assembly of the column and dephlemator. The column design is very similar to the gin basket, but with the addition of a thermo port on top.

Thermo port tube.

The thermo port is just a tube with an opening cut into it. The opening allows the probe to be in the vapor stream, but prevents condensation from dripping onto it and changing the readings. A silicone plug with a thermocouple will seal the tube and measure the vapor temperature.


All the main parts were brazed together and ports for the cooling shell were added. The ports are 1/2" OD tubing and I will use push-to-connect fittings to attach them to tubes.

Hand bent cooling coil.

I also started on the condenser portion of the still. The cooling coil was bent with a 90 degree hand-held tube bender from 3/8" OD tubing. I then annealed the copper and squeezed the coils closer together by hand.


The ends of the coil use 90 degree braze on fittings and a straight tube to connect to a water supply.

The next step for the condenser will involve the collection plates and tube for the condensed liquids.

Thursday, June 14, 2012

home still: dephlegmator update

Here is an update on some work I have been doing for the still. I have mainly been working on the dephelgmator section.

Internal shell parts.

The plates were all waterjet-cut with the holes slightly smaller and finished with a uni-bit drill. The diverter plates are the semi-circular plates in the picture.

Dry fitted together.

I dry fitted them first to figure out the best way to braze them together. I decided it was best to braze the center tube to the diverter plates first.

Center tube brazed to the internal diverter plates.

I used two other tubes to help align the plates. I like the colors that came out when the copper was heated. It's too bad they will be hidden.

Completed internals.

Some of the plates weren't perfectly aligned and some of the plates bent when inserting the outer tubes. I was able to make it work, but it was not visually appealing.

Major components of the dephlegmator.

I decided to bead blast the interior to remove the oxidation from the inside.

Next will be the final assembly.

Monday, May 21, 2012

the car bottle opener

Here is a new bottle opener I designed. This can be mounted on a key chain through the tail pipe.

The car bottle opener.

In use.

home still: gin basket

It has been a while since I posted anything, so here is an update on the home still. I decided to make the gin basket first because it's small and simple. I also used it to learn how to silver braze so I won't mess up on the more complicated and expensive parts.

Side view.


My brazing was rough and I overheated a section so much that the flux burnt off, but I did have some clean sections and learned some things. The first thing I learned was make sure to sand and clean very well. The second was to heat everything evenly making sure not to focus on one part too much.

Bad section.

This is actually my second attempt as the first piece was much worse, and I didn't feel it was worth saving.


Top view.

There was a lot of oxidation that occured because of all the heating. I wet-sanded it with 600 grit sandpaper to get rid of most of it.

Bottom grill.
The grill was cut from a copper sheet with a waterjet. I even included a logo in there.

The next step will be to make the column, which will be the same in construction but longer.

Tuesday, April 03, 2012

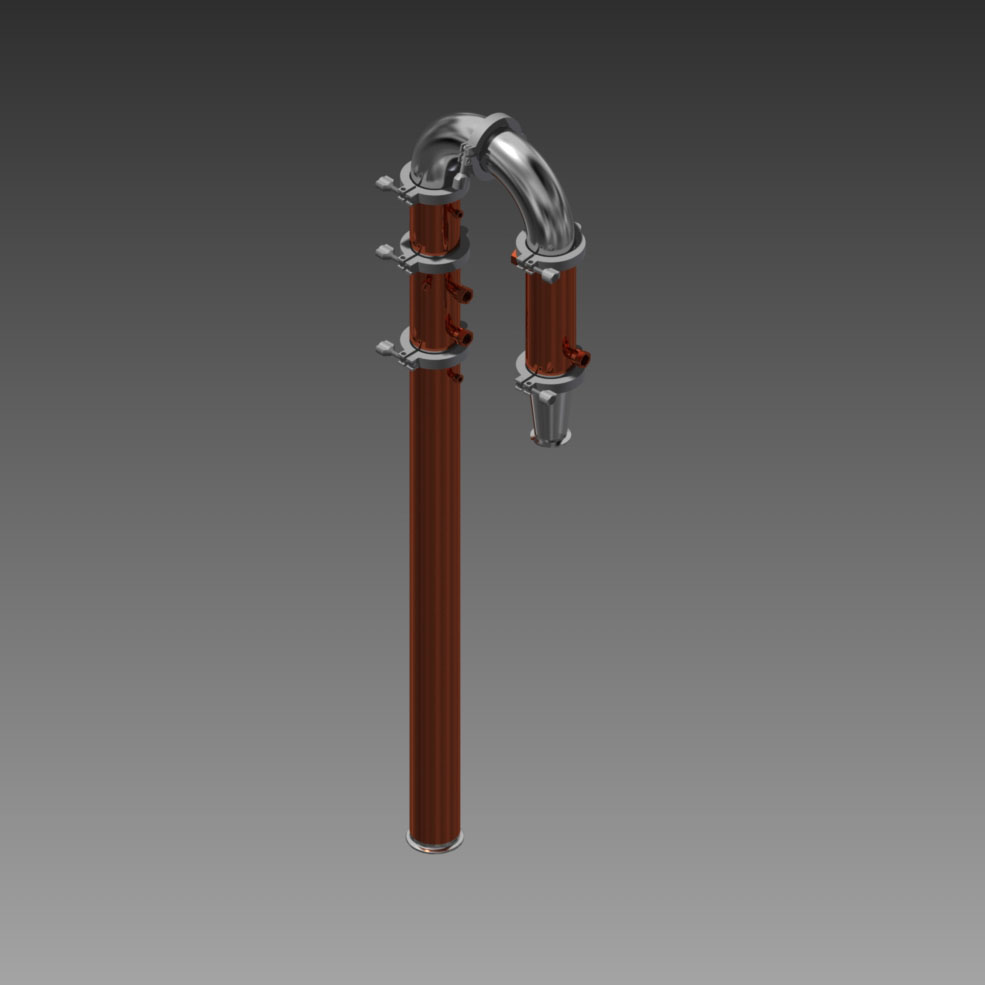
home still: assembly concept 1

Assembly.

Here is the assembled still, minus the pot and collection tube. I will also be working on a parrot to hold an alcometer.

Parts of the still.

The lower thermometer port on the dephlegmator now has been moved to the reflux column. The reflux column and the gin basket are the same in construction with the only difference being the length. The bottom of these two have a plate to prevent the contents of each from falling down.

Close up exploded front view.

The condenser also has a shell and tubes design--same as the dephlegmator except longer, and with one more guide plate inside.

Exploded view.

I may change the condenser to a simpler coiled tube in a shell design to save on cost. And I believe that this may be better at condensing all of the vapor. The dephlegmator is not going to follow this design since its purpose is different. Having a single tube for the vapors to pass through would be too much of a restriction.

In this current design, all stainless components are purchasable and do not require any machining. The copper tubes only require being cut to length and drilled holes if needed. The copper plates will be waterjet cut. Each module will be silver soldered together; and module to module connections will use sanitary seals and clamps.